Good morning!
Sharing an updated playroom tour with you all today, and I’m so excited about it! I also have my first two IGTV episodes going up on my IG for you today, so you can have a tour of it in that form also! Be sure to check it out today, too!
Going to break it down for you all by how I have sectioned the different areas of the room, and give the links for items I have been able to find for you or similar items!
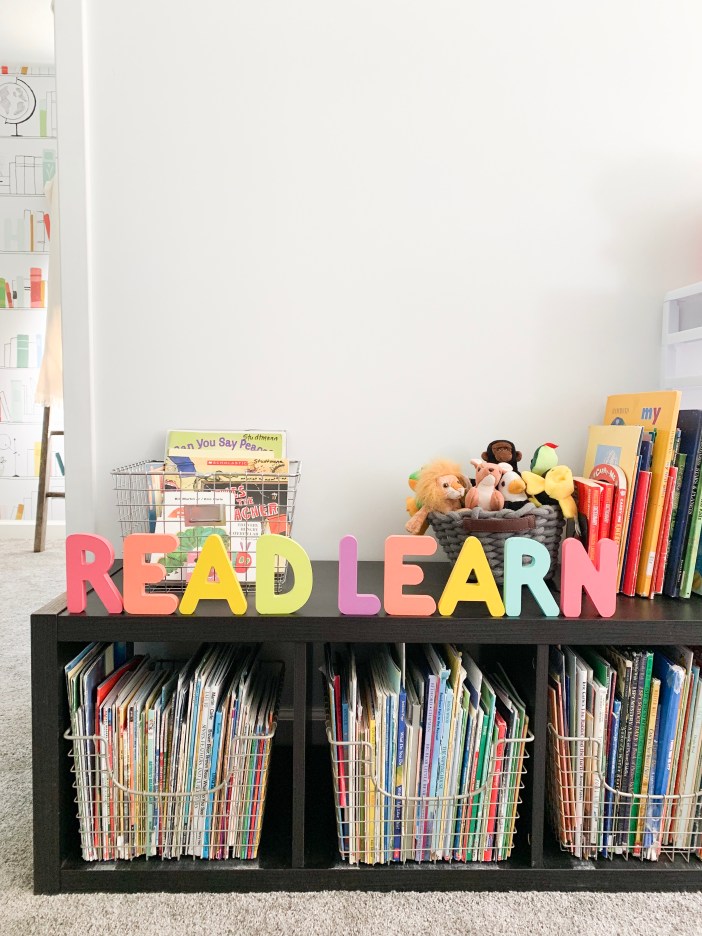
First up- the teepee area:

This little space welcomes you into the playroom! I like to keep Scout’s basket of special toys up here for her to grab, so she doesn’t go after all the other toys in the playroom. She gets to have a little fun too! 🙂 I also like to keep another larger toy tucked in there when we aren’t using it- Tommy’s little turtle with plastic balls! They love to duck in and out of the teepee while they’re busy playing up here, and Tommy loves crawling all around it and making his way to the activity board!


The signs behind the teepee are all from hobby lobby, but the macrame was from an Etsy shop!
I get asked a ton to show how we made the activity board, but Collins was gifted it at Christmas two years ago from her Uncle + his girlfriend that went to town making this! They pretty much went to the hardware and home improvement stores + a couple craft stores/Walmart to make this board come to life. It turned out amazing, and there are so many cool things they made for it. Two of my favorite parts is the marble tube that you can slide marbles into a mason jar, and the peephole they put on with a mason jar on the backside that has pictures of us they printed off for her to look in and see! They’re so creative, and this definitely shows their gift!!
If you look on Pinterest and search for DIY activity boards, you’ll be able to get a lot of great ideas for what to do on your board!
Next up, we have this bench area (aka usually my little catch all spot up here😉)

I have been asked about this bench a lot, and it was Dakota’s parents that they didn’t want anymore and passed down to us. It has SO much great storage. I love it! I found a similar one to it, here! Right now I keep all of my chapter books from my classroom library in the shelving below, but should really swap those out for something else. A project for a cold winter day in a few months! 🙂 I also use the bench part as a spot for storage too. I have my paper organizer sitting on the bench, and pretty much keep the top part for a catch all spot upstairs. I may or may not have had Tommy’s clothes storage bin sitting on it for a handful of months as I’ve stored clothes away that don’t fit him anymore periodically. Oops! The kids never noticed or were bothered by it, so I wasn’t either. 🙂 I do try to keep school/craft-related items on the bench though, since it is in close proximity to other school stuff and the easel! Which leads me to my next stop on this tour…
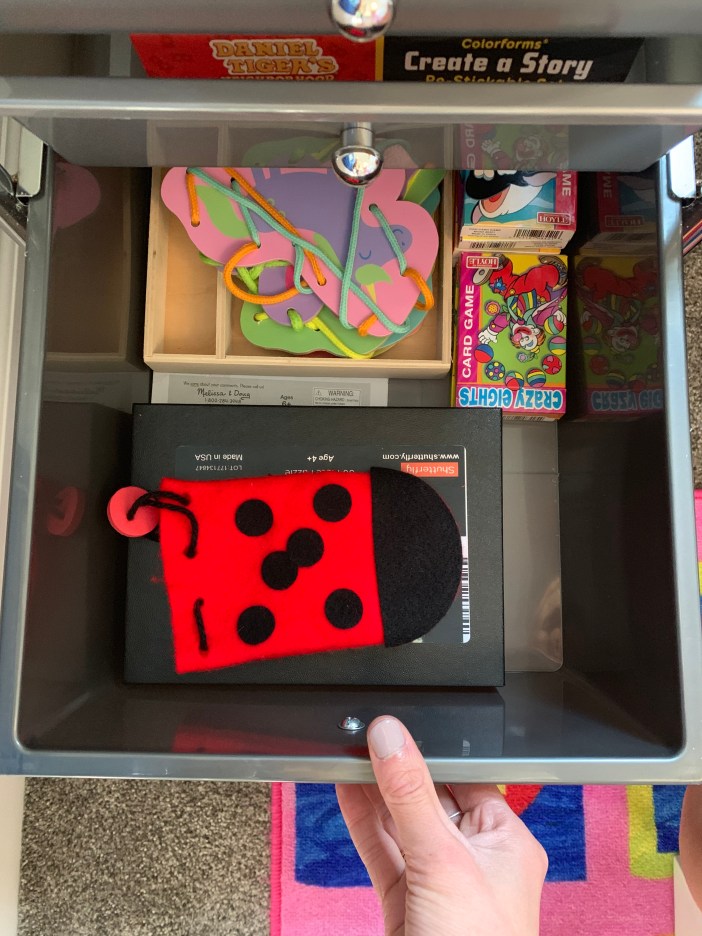
The school/craft area

This is one of our most-used spaces along with the library if you can believe that for our “play” room. The teacher in me loves that fact :). This space has been so much fun to use ever since we finally got around to organizing it last spring! There were very minimal things that it took to get this area in to proper working and functioning form!
When I was thinking about how I imagined this space looking, I knew that I wanted to have elements from my classroom when I was teaching included. I knew I wanted an easel of some sort, a calendar, a space for working and crafting, and a spot to showcase our work. I think if you start with these main pieces for a school or crafting space, you’re off to a great start! The next thing I knew I needed was organizational storage for this space to house all the things so they don’t have to be out in the open all the time. I am a total visual, aesthetically pleased gal, so even though it’s a play room, I did want it to still look neat and tidy when we weren’t busy playing or doing school or craft work up there.
The essentials:
Easel – love the size of this for our space, and also love that it has extra storage underneath and has a built-in craft paper roll on the top for easy crafting and clean up when you want to make something new!
Calendar – ours is from Lakeshore Learning, but you do not have to have something this heavy duty! I had this for my classroom, and loved all the different things you can do with it for teaching with a calendar math style calendar, but not necessary. Here is one very similar to mine, and here is one that is a more simpler option for you!
Small picnic table – Dakota’s grandma found this for us at a garage sale (so sweet!) but here is a similar one!
Work showcasing hanger – I got this from hobby lobby!
Storage highlight details:
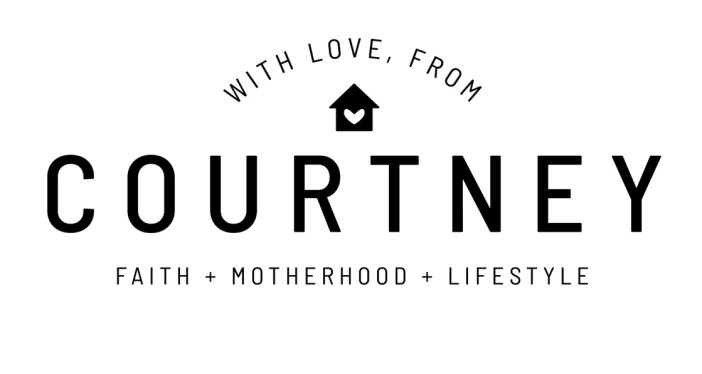
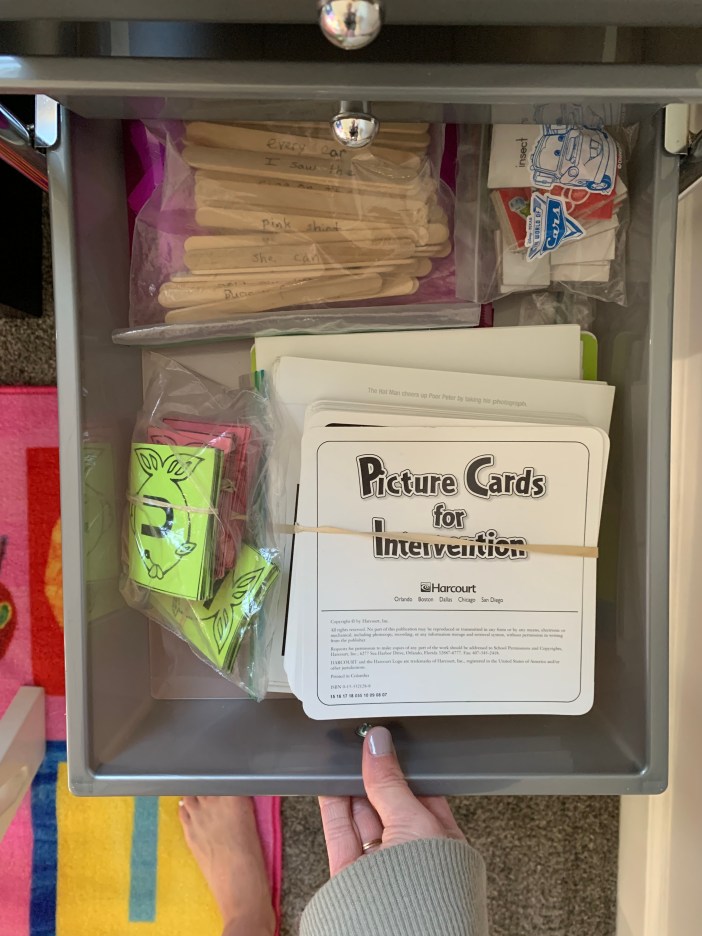
These two rolling storage drawers are my favorite. I had the rainbow colored ones in my classroom, but wanted to have a more neutral option for the playroom since I knew a lot of color would already be in this space with all the toys and rug! I use these for a lot of my office/teaching supplies like post-it notes, highlighters, staplers, tape dispensers, etc. BUT I also have a lot of different things for her to use in them also. I organized the bins based on activity type, so math activities take up a few of the bins, puzzles take up a bin, and lots of different word work activities take up the majority of the bins on the storage organizer to the right! I need to label these bins still, but I kid you not, just these two bad boys alone made my stress level with this space decrease soooo much seeing all the things find their home in an organized place! The best!

I have a lot of our extra craft and school supplies like crayons, playdoh, markers, paint, tissue paper, construction paper… fill-in-the-blank other arts/crafts supplies in these 4-square organizer shelves and in the 2-square organizer. I also love that they can keep that stuff out of sight when you aren’t using them, and keeps the space looking neat and organized.

I’m an organizer inside of an organizer bin type of person, so often times I have smaller bins inside to house the items in my large bins, or like this, just have extra supplies in ziploc bags! It just makes it easier to get at supplies I think when you’re trying to dig them out!


For the markers/crayons we are currently using, I love this caddy I found at hobby lobby, but here is a very similar option you could get! I love that it fits in with our modern farmhouse + touches of galvanized items we have in the home! We also use these caddies for markers and crayons as well that are from my classroom. You could use these for a variety of other things too, even to use for a sorting activity you’re having your child do, I used the ones with the colored cups for sorting Pom Poms when I would work on colors with Collins! You could also use the galvanized one for a fun ice cream bar with all different toppings for your sundaes if you’re hosting a party at your house!
I wanted to keep more of the school-type of spaces in the playroom somewhat separate from the play spaces, which is why directly across from our school and crafting area, you are lead right into our at home library!
The library essentials-

Shelving for your classroom or at-home library is key! I wanted to try to use the shelving options we already had, so I took our vertical 4-square organizer and laid it on its side to create a longer, shorter bookshelf for the majority of our books that are leveled. I’ve shared about leveling books before, and there are a few systems teachers use to do this for their classroom based on how the school/district chooses to level their books, but basically it’s a way for teachers to organize their books based on a few different criteria’s to determine how easy or difficult a book is to read, and give it a letter or number to organize them, so students are reading books that are their current reading level best fit.
Obviously that doesn’t matter for us really right now since my children aren’t actually reading yet, but will be great in the future! Leveling takes a lot of time at first, I’ll be honest, and I often had my classroom moms work on that for me when they came in, but once it’s done it is amazing and so much easier to set up and organize again if you switch classrooms or do something like I did where you turn your classroom library to an at-home library!
Anyways, I wanted bins that could be multi-use and were pretty :), so I got these wire baskets to put our leveled books in on the shelf. I like how they have a wider opening and dip down, making it easier to pull books out of them for the kiddos! I used a similar one for the one bin I keep on the top of the shelf, which is our seasonal bin I rotate books out of based on the season or upcoming holidays. Collins LOVES when its time to change it over and is constantly pulling out the new books after I switch them out, it’s fun to see her excitement over new books, even ones she’s read before but hasn’t seen or read in a while!
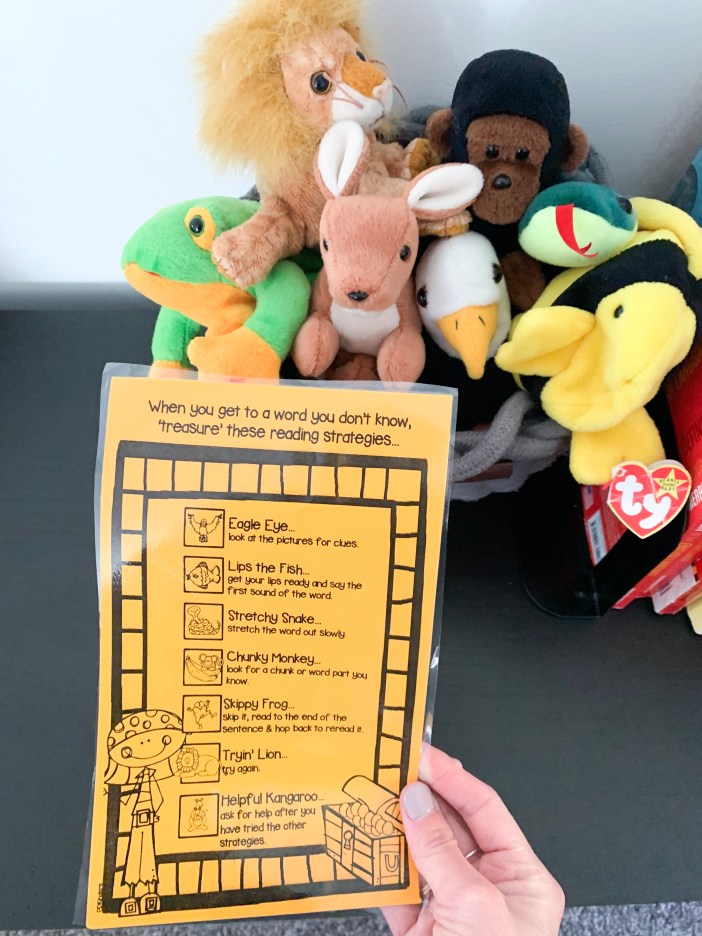
On top of the shelf I also keep our reading buddies that I had in my classroom for daily 5 as a reminder to use helpful reading strategies independently for my students. These aren’t super relative to us right now, but once they are reading will serve the same purpose. We call them our reading buddies still now though. 🙂 I also keep our non-fiction type of books on the top of this shelf using bookends to keep them up.
One other thing I had in my classroom that I added in here is my days of the week sterlite 3-drawer organizer. I just stacked two on top of each other so I had enough for all the work days of the week, and the last drawer was always where I organized the items I would need for the following week! I would put the paper worksheets we were doing, books I was using that day, and my teacher manuals in these, organized in the order we were doing them that day, so I always was prepared for the next day. It helped me so much in keeping every day organized for the activities I was doing with my students. Not super relevant to us right now, but as C and I have started to do more “school” work together, these will be used in a similar way!

We received this double-sided bookshelf from my MIL for the kiddos, and I love how it houses a lot of our regularly-grabbed books and naturally closes off the library to create its own little space to enter in! I had one of these in my classroom, but it was flat on the other side, so it was able to be flush against the wall! They have lots of different versions you can get, but these are hands down the best bookshelves and they are one of my favorite items we have up in the playroom. I have my bean bags I had in my classroom in this little space for cozy spots for them to sit in, and it’s so fun to see both of them sneak into the library and settle in to a beanbag! Even Scouty loves the bean bags! 🙂
I keep our other seating options (crate seats) near the library, and also use them for storage to keep extra blankets and our fort making kit items in them when we aren’t using them! These crate seats are super easy to make and were a huge hit in my classroom with students as a flexible seating option! I also have this large hyacinth basket for alllll the stuffed animals. It is so sturdy and deep! I keep them next to the library for them to grab and play with or use for a reading buddy while they’re reading in the library!

Last but not least- the toy space!
I keep all of the toys that we have upstairs (which is most aside from a few we keep down in the nook + their kitchen that’s also in the nook) in this white toy chest that was passed down to us from Dakota’s parents I just painted white and this organizer bin shelf I had in my classroom! I think eventually I would want to get a more neutral one like this one, but this works great for now!
I tried to organize the toys I kept on this open shelving based on the type of toy they are. I have all the doctor toys in one bin, all the different blocks we have separated in a few other bins, puppets/frozen Barbie dolls in another, and all of the baby toys in a big bin, that I could easily pull out for Tommy when. I will rotate these out and reorganize them probably this coming winter when Tommy is done playing with some of the baby toys!

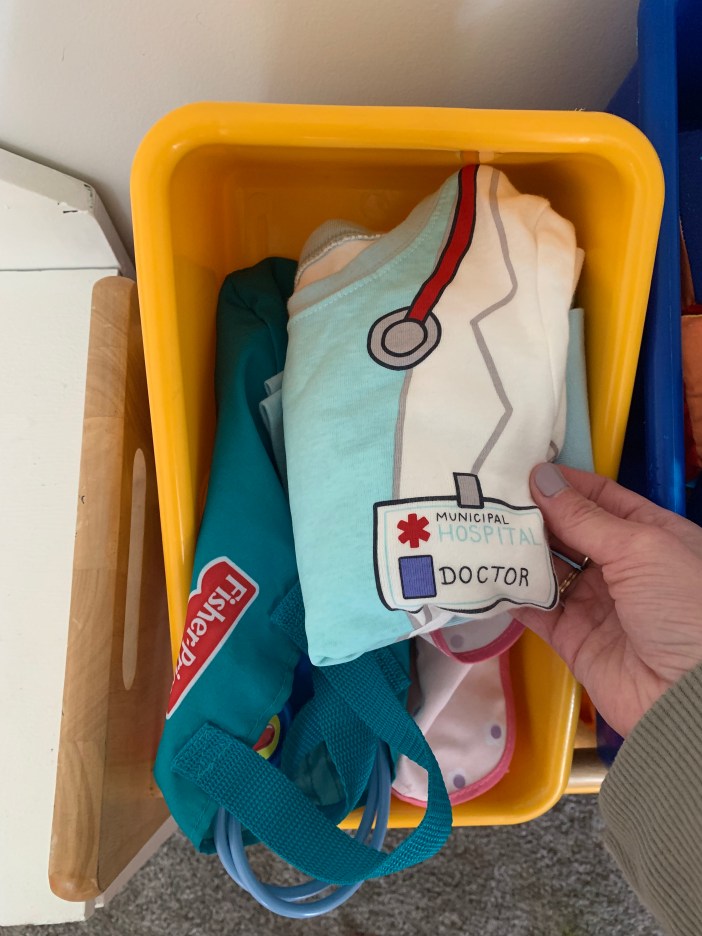
These little doctor dress up clothes are actually PAJAMAS! I just got them for C and her face lit up soooo big when I showed her. The doctor ones are currently out of stock, because Old Navy has their big kids sale going on, but there are other versions like this firefighter one for $5, an astronaut one, artist one, and more! These would be so easy for an inexpensive Halloween costume too!!

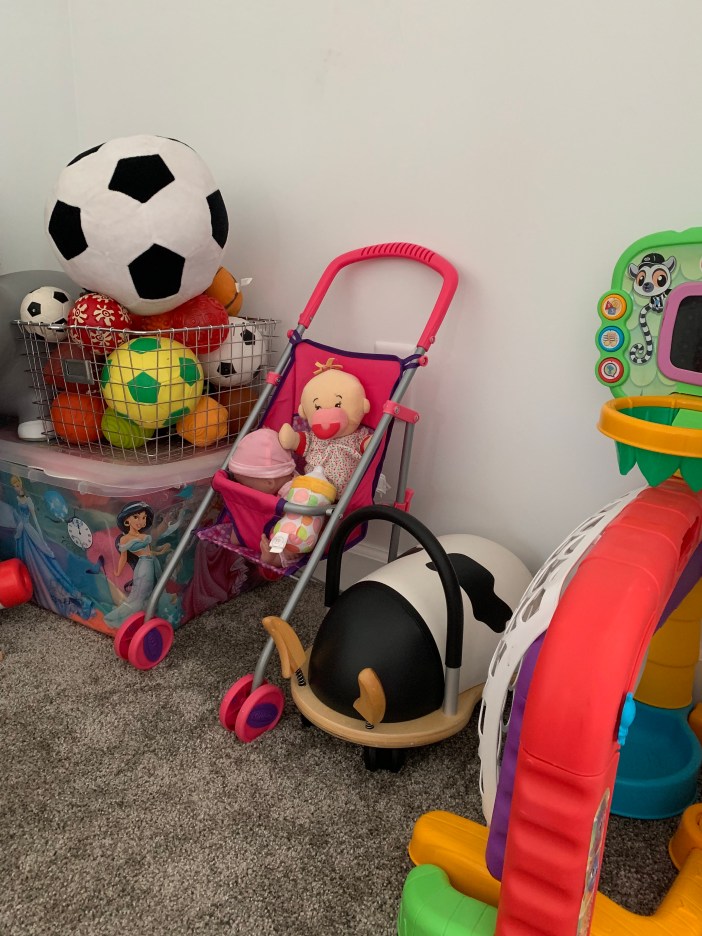
C loves this little vet set! We play with this toy set almost daily! love to keep this space organized and neat looking by keeping everything along the perimeter of the room. I’ve shared this tip before on my IG stories, and did this same thing when I had a classroom. It keeps the rest of the space nice and open, and really is a simple fix to making a room go from cluttered to clean very quickly!

The newest item we added up here is this caterpillar tunnel Tommy got for his birthday! I got asked a lot about it when we had it out on our porch, and I think eventually this will go back outside if we get a sandbox! It’s a little big for up here for my liking, but I keep it over by the library so the kids can crawl into the library space! They love it, so it’s okay for now where it is :).
I hope this post inspires and blesses you in getting a play AND learning space created in your own home! It was fun (and a lot of work!) getting this ready for you all, so I hope it’s helpful. I am positive I missed something, so if there’s anything else you see in these photos that catches your eye and I didn’t touch on, feel free to leave a comment below and I will try to answer it or find a link for it!
Have a great day, friends!
with love,
from courtney